Generate sketch
WizDash builds an ESP32 sketch from the project’s connection settings and dashboard. You can open it directly in the Arduino IDE.
Open Generate Arduino Code
Section titled “Open Generate Arduino Code”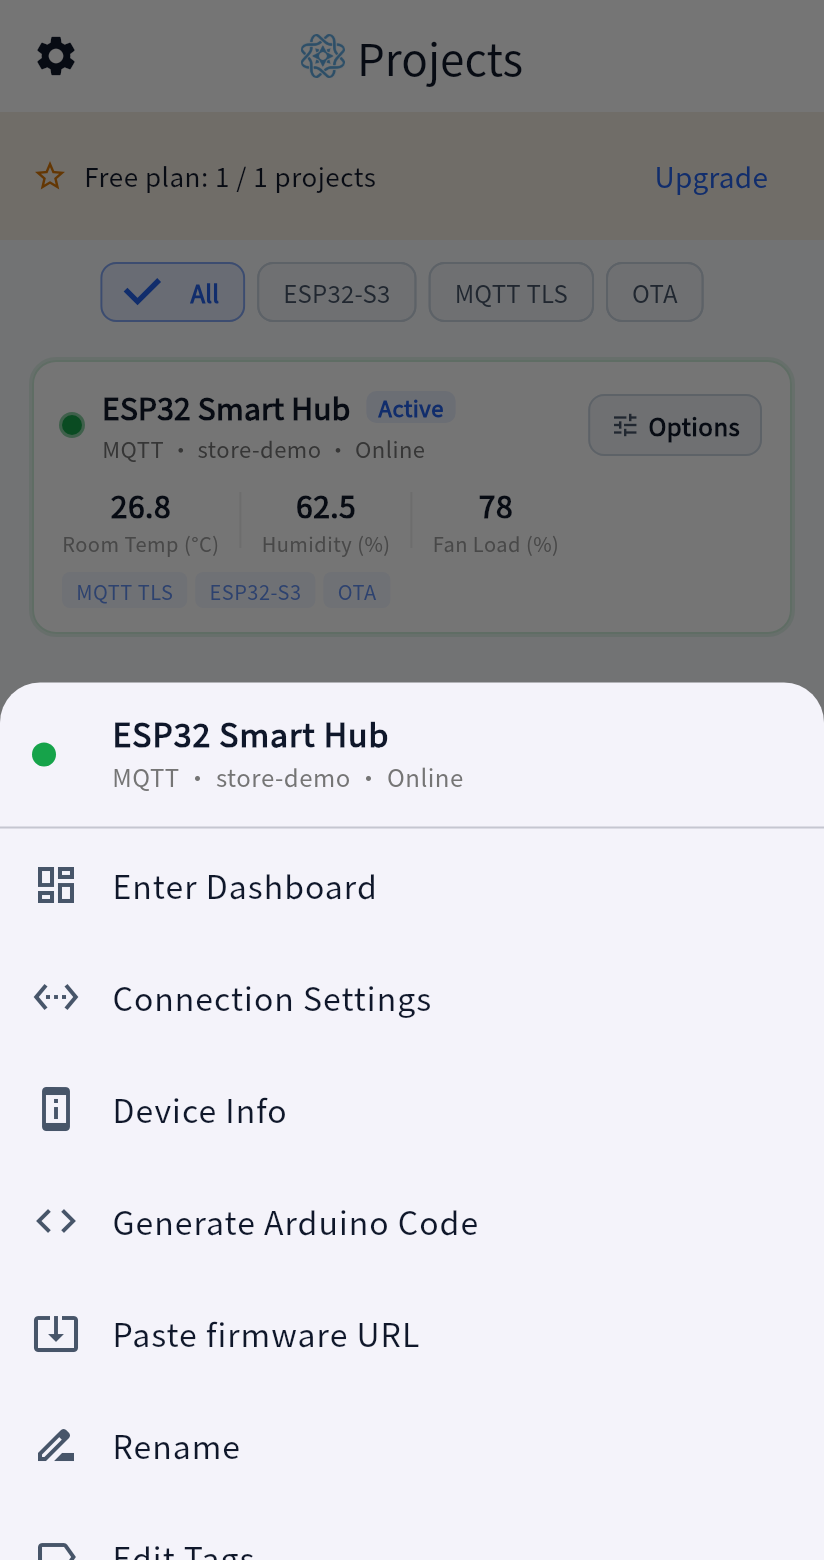
- Open the app and go to the Projects screen.
- Find the project, then tap the Options button on the right side of its card.
- In the project menu that opens, tap Generate Arduino Code.
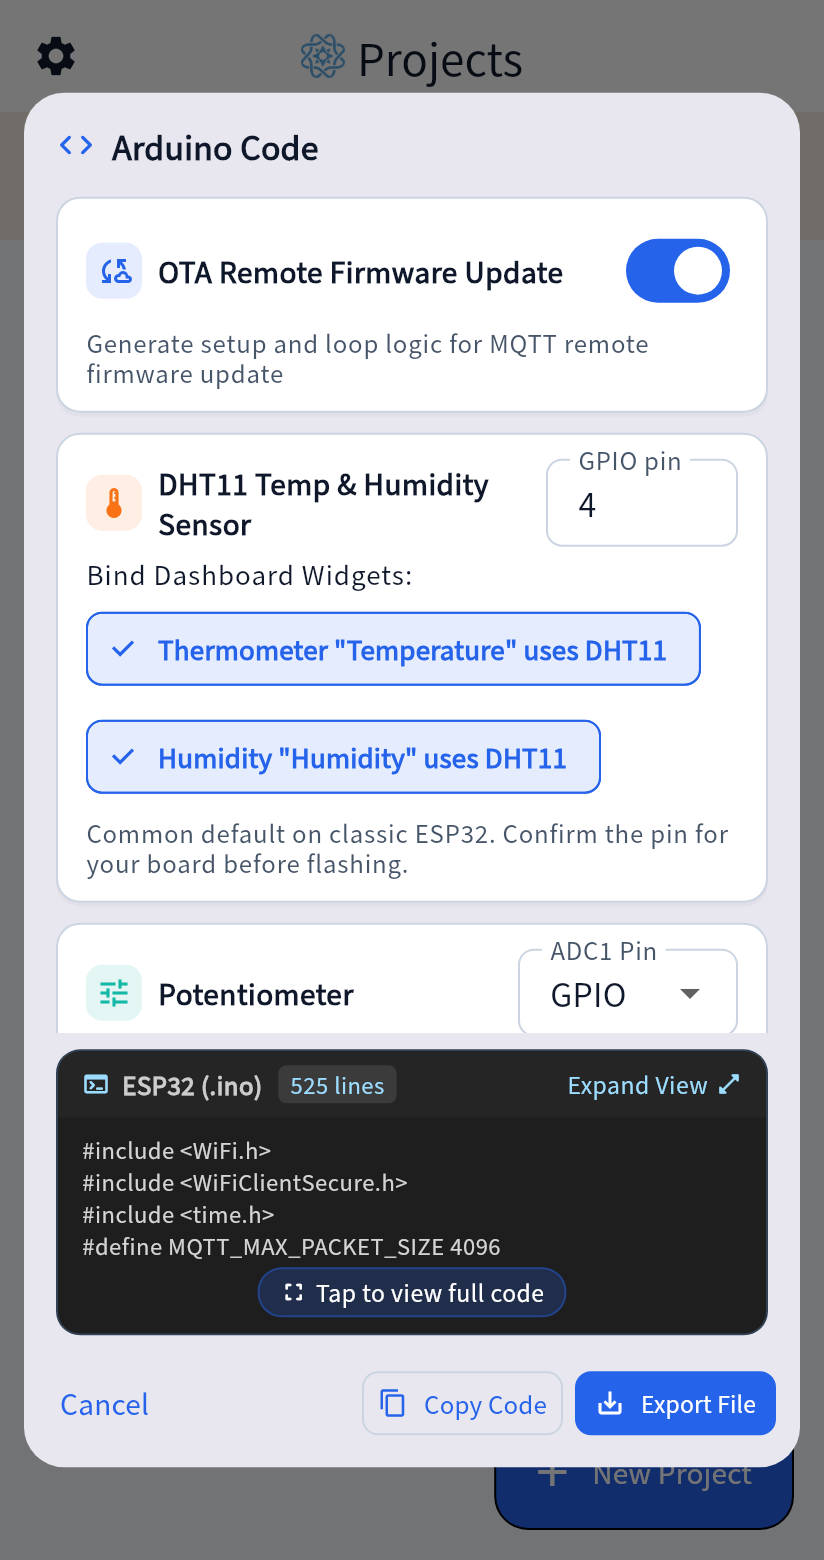
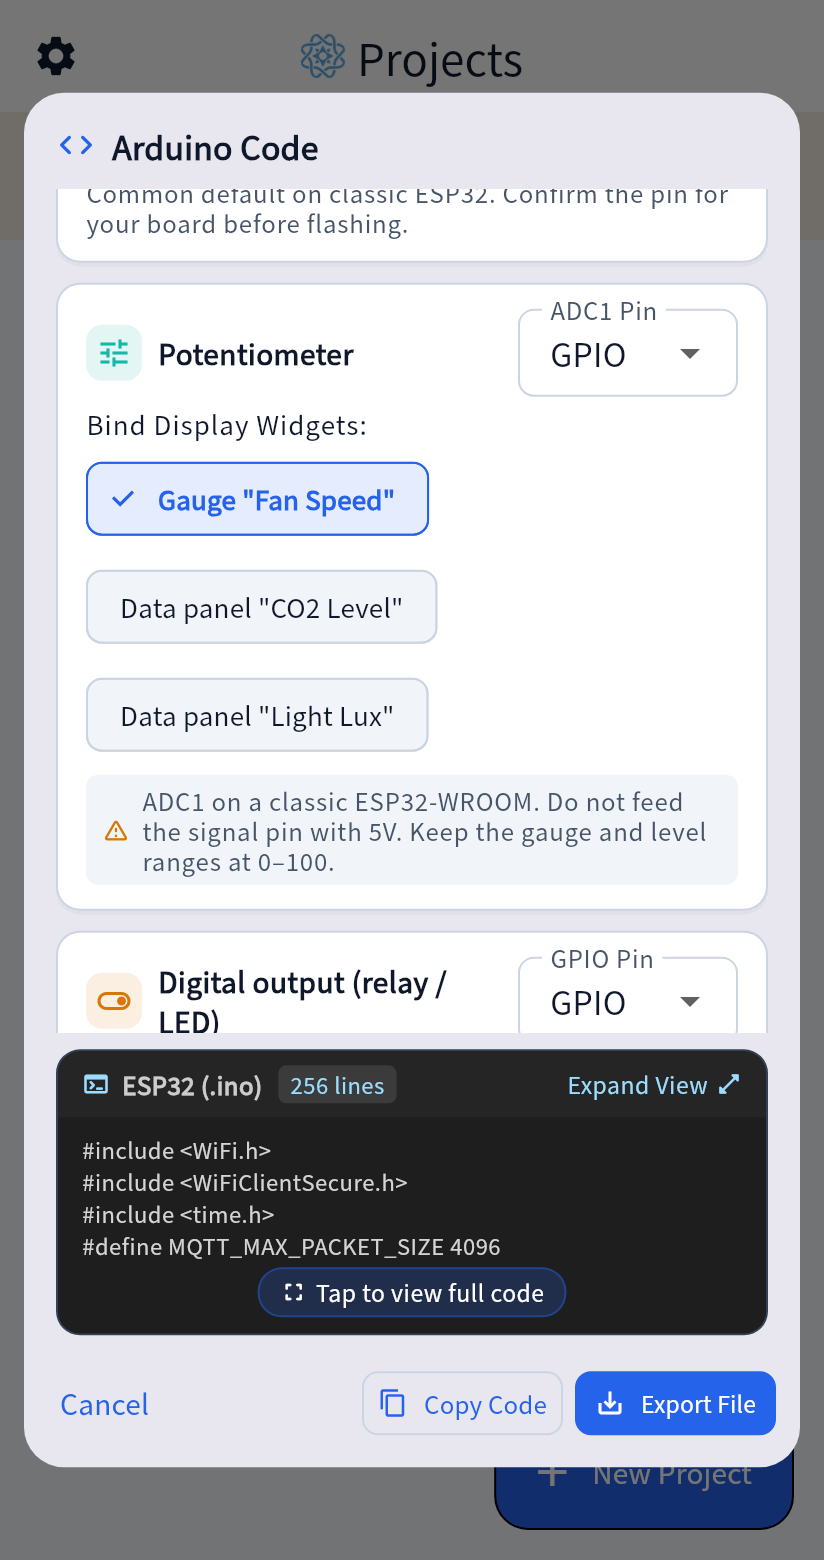
- In the Arduino Code dialog, set the optional peripherals you need. An MQTT project also has an OTA toggle.
- Tap Copy Code and paste it into the Arduino IDE, or tap Export File to save an
.inofile.
If the connection settings are not complete, the app shows a “Connection setup incomplete” message and does not open the dialog. Tap Connection Settings in the same project menu first, then come back.
What the sketch contains
Section titled “What the sketch contains”The sketch includes the connection flow for the mode you chose, and two functions for you to finish:
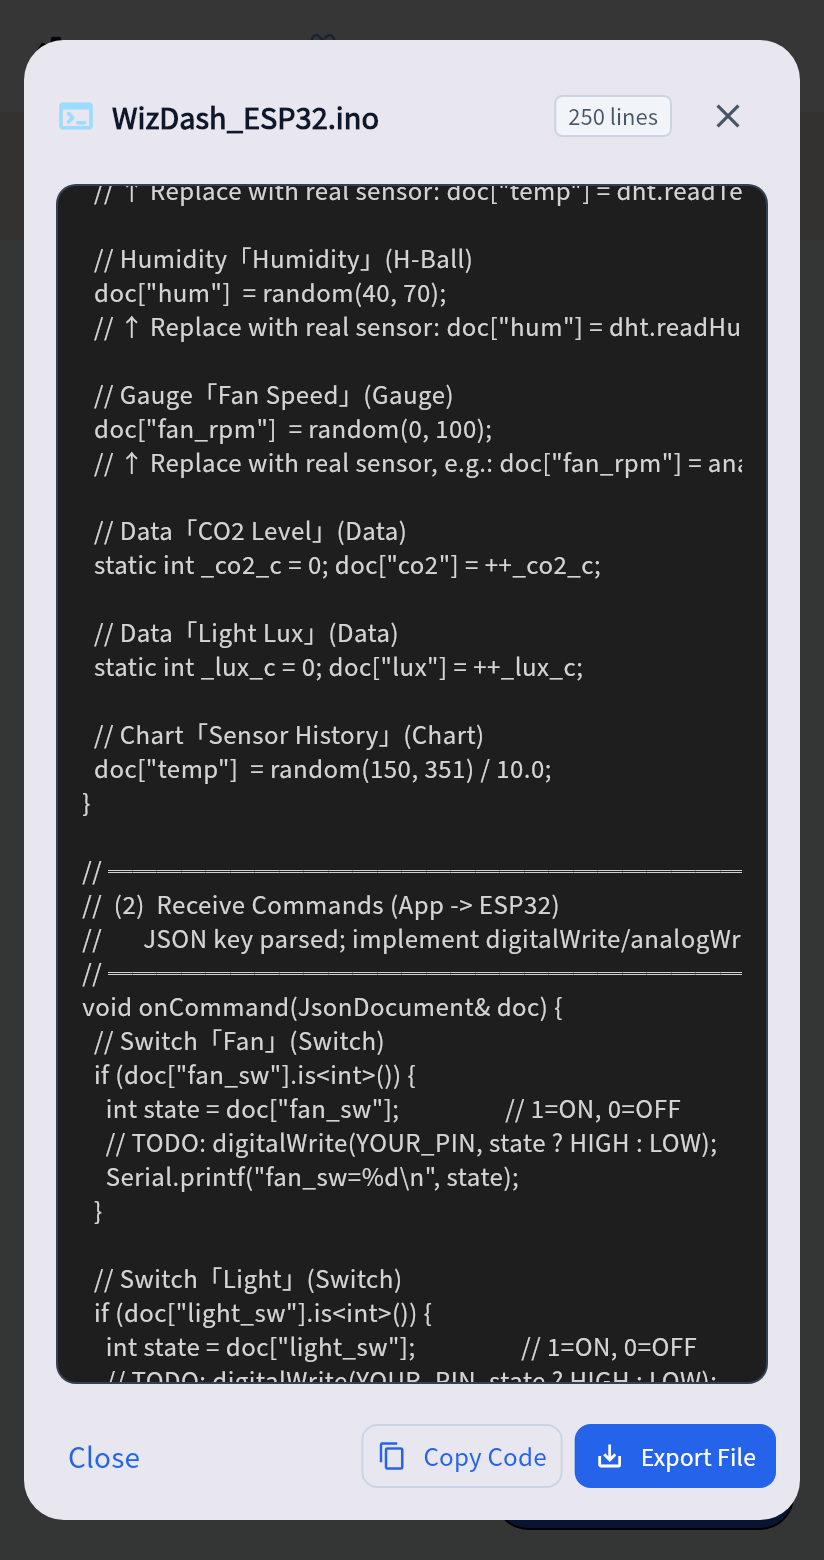
sendDatacollects the display keys into one JSON object and sends it to the app.onCommandreceives commands from the app and leaves the matching hardware action in a comment.
The sketch is a starting point. Without a chosen peripheral, readings are sample numbers, and the hardware actions for controls are marked TODO. Before flashing, check the pins, the JSON keys, and the WiFi or broker settings. On Android, the saved file goes to the Download folder.
Required Arduino libraries
Section titled “Required Arduino libraries”Before flashing, do two things in the Arduino IDE. The comment at the top of the generated sketch lists the same libraries.
- Choose the board. Open Tools → Board and select the ESP32 model that matches your board, such as
ESP32 Dev Module,ESP32S3 Dev Module, orESP32C3 Dev Module. If the ESP32 board package is not installed yet, install Espressif’sesp32package in Boards Manager first. - Install the libraries. Open Tools → Manage Libraries, then search for and install the libraries in the table below.
| Connection | Library | Author | Used for |
|---|---|---|---|
| All modes | ArduinoJson | Benoit Blanchon, v7 or later | Builds the JSON object in sendData and parses commands in onCommand |
| BLE | NimBLE-Arduino | h2zero | Provides the BLE service and advertising |
| WiFi | WebSockets | Markus Sattler | Serves WebSocket on port 81 |
| MQTT | PubSubClient | Nick O’Leary | Connects to your own MQTT broker |
WiFi, ESPmDNS, WiFiUdp, WiFiClientSecure, and the HTTPClient and Update that OTA uses are all built into the ESP32 board package. You do not need to install them separately.
The sketch fails to compile with ArduinoJson v6 or earlier. If the compiler reports a missing header, check that the libraries in the table are installed and meet the version requirement.
Optional peripherals
Section titled “Optional peripherals”While generating the sketch, you can attach some widgets to common parts. The choice applies only to that generated file. It is not saved in the project.
| Part | Widgets it can drive |
|---|---|
| DHT11 temperature and humidity sensor | Thermometer, Humidity Ball |
| Potentiometer | Data Card shows the raw reading. Gauge and Level show a percentage. |
| Relay or external LED | One Switch, active-low or active-high. |
| RGB LED | One Color Picker, common cathode or common anode. |
| PMS3003, PMS5003, or PMS7003 dust sensor | One Data Card. |
When you choose DHT11, you also need DHT sensor library (by Adafruit) and Adafruit Unified Sensor, in addition to the libraries above. The comment at the top of the sketch adds both once you choose it. The other peripherals use built-in ESP32 features (analogRead, digitalWrite, analogWrite, Serial2) and need no extra library.
If the dashboard has a Map widget and you attach a GPS module yourself, a comment in the sketch suggests the TinyGPS++ library. The sketch does not insert GPS reading code for you.
The available pins follow a classic ESP32-WROOM and avoid pins that have a special role at startup.
For an MQTT project, you can also include over-the-air update support when generating the sketch. See OTA updates.